
A property condition report is a written record of a property's state at a specific point in time - usually at the start or end of a tenancy, or during a commercial real estate transaction. It documents what every room, surface, fixture, and appliance looks like so there's no argument later about who caused what damage.
If you manage rental properties, this is the document that settles security deposit disputes. If you're buying commercial real estate, it's part of the due diligence that tells you what repairs you're inheriting. Either way, a vague or incomplete report is almost as useless as having none at all.
This guide covers what goes into a property condition report, how to document each room properly, why video is replacing photos as the standard for evidence, and the new state laws that now require dated documentation.
What is a property condition report?
A property condition report (sometimes called a property condition assessment or a move-in/move-out checklist) is a standardised document that records the physical state of a property. It covers structural elements, fixtures, appliances, walls, floors, windows, and any existing damage or wear.
There are two main contexts where these reports get used:
Rental properties. Landlords and property managers create a condition report at the start of a tenancy (move-in) and again at the end (move-out). Comparing the two shows what changed during the tenancy. This is how security deposit disputes get resolved - or avoided entirely.
Commercial real estate. Buyers and lenders commission a property condition assessment before a transaction closes. These follow ASTM E2018 standards and are typically done by professional engineers. They identify deferred maintenance, structural issues, and capital expenditure needs.
This guide focuses primarily on rental property condition reports, since those are the ones most landlords and property managers create themselves.
When you need a property condition report
Not every situation calls for the same level of documentation. Here's when a condition report matters most.
| Situation | Why it matters |
|---|---|
| Tenant move-in | Establishes the baseline. Without this, you have no proof of what the property looked like before the tenant lived there |
| Tenant move-out | Compared against the move-in report to identify tenant-caused damage vs. normal wear and tear |
| Periodic inspections | Catches maintenance issues (leaks, mould, pest damage) before they become expensive |
| Property sale | Gives buyers a clear picture of what they're getting. Required for most commercial transactions |
| Insurance claims | Proves the pre-loss condition of the property. Without documentation, claims get denied |
| Turnover between tenants | Documents the condition after one tenant leaves and before the next moves in. Closes the accountability gap |
If you only do one, make it the move-in inspection report. Everything else becomes easier when you have a documented starting point.
What to include in a property condition report
A useful condition report is specific. "Kitchen - good condition" tells you nothing when a tenant disputes a deposit deduction six months later. "Kitchen backsplash - two cracked tiles behind sink, see photo 14" tells you everything.
Property details
Start with the basics: property address, unit number, date of inspection, inspector's name, and whether this is a move-in, move-out, or periodic inspection. Include the tenant's name and lease start date if applicable.
Room-by-room checklist
Go through every room systematically. For each room, document:
- Walls and ceilings - paint condition, cracks, holes, stains, scuff marks
- Floors - scratches, stains, carpet wear, tile damage, squeaky boards
- Windows and doors - glass condition, locks, screens, frames, weatherstripping
- Light fixtures and switches - all working, covers intact, bulb types
- Outlets and electrical - functioning, plate covers present
- Built-in fixtures - shelving, closet doors and rods, towel bars, mirrors
- Appliances (kitchen/laundry) - make, model, condition, any existing damage
Bathroom specifics
Bathrooms need extra attention because water damage is expensive:
- Caulking condition around tub, shower, and sink
- Grout condition on tile
- Toilet base seal and flush mechanism
- Under-sink cabinet for signs of leaks or water damage
- Exhaust fan operation
- Shower pressure and drain speed
Exterior and common areas
If the report covers a house or the tenant has access to exterior spaces:
- Front and back doors, locks, and hardware
- Porch, deck, or patio condition
- Garage door operation and floor condition
- Yard, landscaping, and fencing
- Gutters and downspouts
- Mailbox
Condition ratings
Use a consistent rating scale across every item. Something like:
| Rating | Meaning |
|---|---|
| New | Unused, no wear |
| Good | Minor wear consistent with age, fully functional |
| Fair | Visible wear, cosmetic issues, still functional |
| Poor | Significant damage, needs repair or replacement |
| Missing | Item not present |
Subjective ratings only work when paired with photos. "Fair" means different things to different people. A photo of the actual condition removes that ambiguity.
Why video documentation beats photos
Photos have been the standard for property condition reports for decades. They're better than nothing, but they have real limitations.
A photo shows a single angle at a single moment. It doesn't show the crack that extends around the corner, the door that sticks when you try to close it, the faucet that drips, or the outlet that sparks. A photo of a clean-looking carpet doesn't show the stain that's only visible from a certain angle in natural light.
Video solves most of these problems. A walkthrough video of each room captures context that photos miss: the full sweep of walls and ceilings, how fixtures actually function, ambient noise from HVAC or plumbing, and the overall feel of the space. It's also harder to dispute. A tenant can argue that a still photo doesn't show the full picture. A continuous video walkthrough is much harder to challenge.
What's changing in the industry: The National Association of Mortgage Field Services (NAMFS) updated their property preservation standards in 2025 to include optional video documentation for damage validation. Several property management platforms now support video uploads alongside photo evidence. The direction is clear: video is becoming the expected standard for serious property documentation.
How to do it well:
- Walk each room slowly. Start at the doorway, pan across the full room, then move to details. Narrate what you're seeing: "Kitchen, north wall. No damage. Moving to the countertops..."
- Show things in context. Don't just zoom in on damage. Show the full wall first, then move closer. This prevents arguments about where the damage is located.
- Test things on camera. Turn on faucets, flush toilets, open and close windows, flip light switches. Functional issues are invisible in photos.
- Keep it continuous. One unbroken video per room is more credible than edited clips.
Recording tip: You don't need professional equipment. A modern phone camera in good lighting produces video that's more than adequate for condition reports. What matters is stability (use a steady hand or mount), lighting (open blinds, turn on all lights), and narration (describe what you're documenting as you go).
State laws you need to know
Property condition documentation isn't just a best practice - in many states, it's the law.
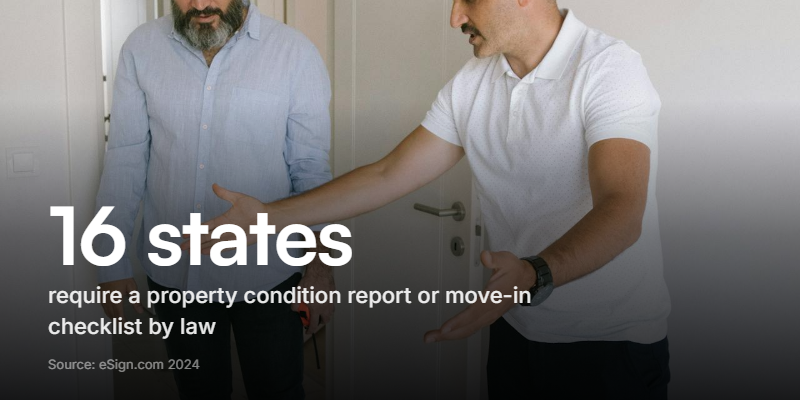
Sixteen US states currently require landlords to complete some form of move-in condition report or checklist. These include Arizona, Georgia, Hawaii, Kansas, Kentucky, Maryland, Massachusetts, Michigan, Montana, Nevada, New Hampshire, North Dakota, Utah, Virginia, Washington, and Wisconsin. Roughly half of these states only require the checklist when a security deposit is collected.
California's new photo requirements
California raised the bar with Assembly Bill 2801, which introduced mandatory photo documentation in two phases:
- April 1, 2025: Landlords must photograph the unit upon receiving possession after a tenant moves out, and again after any repairs or cleaning for which security deposit deductions are made.
- July 1, 2025: Landlords must photograph the unit immediately before or at the start of any new tenancy.
All photos must be date-stamped and provided to the tenant. They must be retained for at least four years. The penalty for non-compliance in bad faith: the landlord loses the right to claim any amount from the security deposit.
This matters beyond California. When one of the largest rental markets in the country mandates dated photo documentation, other states tend to follow. If you manage properties in any state, treating California's requirements as your baseline is a reasonable bet.
How to create a property condition report
Here's the practical workflow for putting a condition report together, whether you're using a template, a form builder, or starting from scratch.
1. Schedule the inspection. For move-in reports, do it the day before the tenant takes possession - not weeks before. Conditions change. For move-out reports, do it within 24 hours of the tenant vacating.
2. Prepare your checklist. Have your room-by-room template ready before you arrive. Walking through a property without a checklist leads to inconsistent documentation and missed rooms.
3. Start with the exterior. Work your way from the outside in: exterior, entry, then room by room. This creates a logical flow that's easy to review later.
4. Document as you go. For each room, rate each item on your scale, note any specific damage, and take photos or video. Don't plan to "come back and add notes later" - you won't remember the details.
5. Capture evidence for every deficiency. If something is damaged, stained, broken, or missing, photograph it and describe it in writing. "Scratch on hardwood floor, living room, east wall, approximately 18 inches long" is what you need. "Scratch on floor" isn't enough.
6. Get it signed. Both parties (landlord and tenant) should sign and date the completed report. Give the tenant a copy. If the tenant disagrees with anything, note their objections on the report and let them add their own photos.
7. Store it properly. Keep the report, all photos, and all video for at least the duration of the tenancy plus your state's statute of limitations for deposit claims. California now requires four years minimum. Digital storage is easier to manage than paper.
Common mistakes that cost landlords money
These are the errors that turn a routine condition report into a lost deposit dispute.
- Vague descriptions. "Some wear on carpet" means nothing in a dispute. Document the location, size, and nature of every deficiency specifically enough that someone who wasn't there can understand it.
- No date on the report. An undated condition report has almost no evidentiary value. Date-stamp everything: the document, the photos, the video.
- Skipping rooms. A report that covers the kitchen and bathroom but skips the bedrooms and garage creates gaps. If damage shows up in an undocumented room, you have no baseline to compare against.
- Only documenting damage. If a wall is in perfect condition, note that. "Living room, north wall: no damage, freshly painted white" is useful because it establishes the baseline for comparison at move-out.
- Waiting too long. A move-in report done two weeks after the tenant moved in is compromised. Any damage documented could have been caused by the tenant during those two weeks.
- Not getting the tenant's signature. Without the tenant's acknowledgment, they can later claim the report was inaccurate or that they never saw it. Some states require tenant signatures for the report to be valid.
- Relying on photos alone. Photos miss functional issues (dripping taps, sticky doors, electrical problems) and can be ambiguous about location. Video provides the context that photos lack.
Build a better condition report
If you're still using paper checklists or basic PDF templates, you're making more work for yourself and creating weaker documentation.
A modern property condition report should combine structured data (room ratings, item checklists, measurements) with rich media (photos and video) in a single submission. The inspector walks through the property, fills in ratings, records video narration for each room, and submits everything in one flow. No separate photo uploads, no emailed PDFs, no paper forms that need to be scanned.
Clipform lets you build exactly this kind of report. You can set up a room-by-room walkthrough form where inspectors rate each area, record video of each room directly in the browser, and submit the entire report in one go. Every submission lands in a dashboard with auto-transcribed video, timestamped entries, and a structured data export. If you're managing multiple properties, it's a significant upgrade over spreadsheets and email threads.


